Configuring LiveWire to Send Telemetry to ThreatEye
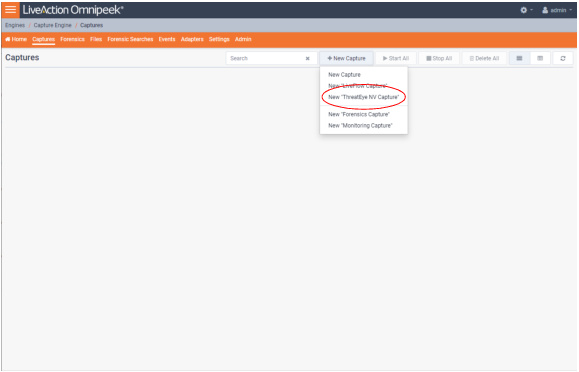
1. Use Omnipeek to view the Captures page.
2. Click and select New “ThreatEye NV Capture”.
3. Configure the ThreatEye NV Capture.
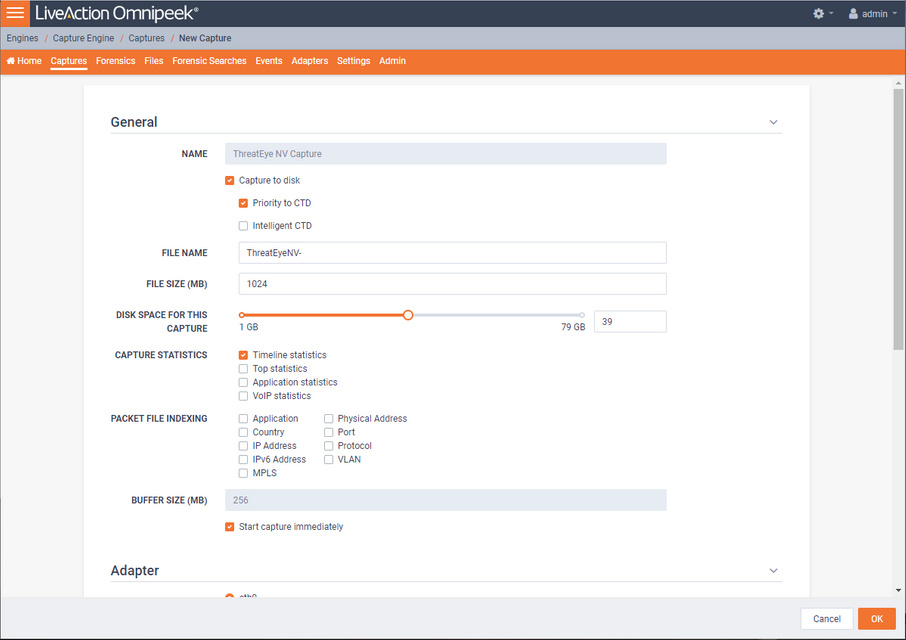
General
The General settings let you set up and configure the ThreatEye NV capture.
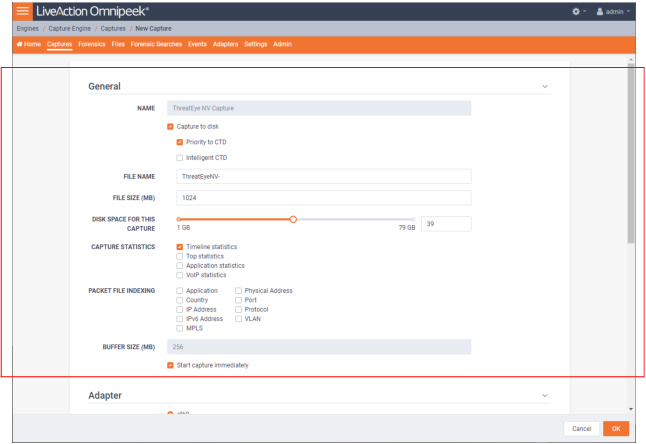
• Name: Displays the name for the ThreatEye NV capture.
• Capture to disk: Select this option to save packet files on your disk. Packet files saved to your hard disk (and the individual packets/packet decodes in each of the files) can be opened and analyzed at a later time with Omnipeek. If you are more interested in speeding up analysis of the data and conserving hard disk space, you may want to disable Capture to disk.
• Priority to CTD: Select this option so that real-time analysis doesn't impact the capture-to-disk (CTD) performance. When this option is enabled, it is less likely that packets are dropped when they are captured to disk. If capturing all the packets to disk is desirable, enable Priority to CTD. If analysis is more important, disable Priority to CTD.
• Intelligent CTD: Select this option to reduce the amount of data stored to disk and increase your retention time by intelligently slicing off encrypted payloads. It does this by tracking flows—if a flow is encrypted, the full data for the first 20 packets is kept and the payload from the rest of the packets is sliced. It keeps the first 20 without slicing so the certificate exchange is always included.
• File Name: Type the name used as a base file name prefix for each capture file that is created using the Capture to disk option. Additionally, each capture file is appended with a timestamp indicating the date and time the file was saved. The format of the timestamp is YYYY-MM-DD-HH.MM.SS.mmm.
• File Size (MB): Enter or select the maximum file size before a new file is created.
• Disk Space For This Capture: Move the slider control to set the amount of hard disk space allocated for the capture. The minimum value of the slider is the minimum size of disk space a capture can occupy.
• Capture Statistics: Select the type of statistics desired for the capture:
• Timeline Statistics: Select this option to populate the capture engine database with capture data and basic network statistics such as utilization, size, distribution, etc. These statistics are then made available through the Capture Engine Forensics tab.
• Top Statistics: Select this option to populate the capture engine database with top nodes and top protocols statistics. These statistics are then made available through the Capture Engine Forensics tab.
• Application Statistics: Select this option to populate the capture engine database with applications statistics which are made available through the various ‘application’ displays.
• VoIP Statistics: Select this option to populate the capture engine database with VoIP call quality and call volume statistics. These statistics are then made available through the Capture Engine Forensics tab.
NOTE: Selecting the VoIP Statistics option may affect capture performance, especially when there are more than 2000 simultaneous calls on the network. Selecting the Top Statistics option may affect capture performance, especially when there are more than 10,000 active nodes captured on the network.
• Packet File Indexing: Under certain conditions, Packet File Indexing increases performance for forensic searches that use software filters. Overall capture-to-disk performance can degrade slightly, but forensic search results may be returned significantly faster if the packet elements being filtered are contained in the index and the packet characteristic is sparsely located within the packet files being searched. Enable the packet characteristics below you are most likely to use in a forensic search software filter.
• Application
• Country
• IP Address
• IPv6 Address
• MPLS
• Physical Address
• Port
• Protocol
• VLAN
• Buffer Size (MB): Enter a buffer size, in megabytes, for the amount of memory dedicated for the capture buffer. The capture buffer is where packets are placed for analysis. The default is 256 megabytes. A larger buffer can reduce or eliminate packet loss due to spikes in traffic. When Capture to disk is enabled, the Buffer Size option is unavailable.
• Start Capture Immediately: Select this option to immediately begin capturing packets once you click .
Adapter
The Adapter settings display the capture adapters available on LiveWire. All locally installed capture adapters are listed; however, only a supported capture adapter can be selected as the ThreatEye NV capture adapter.
• Select the desired adapter as the ThreatEye NV capture adapter.
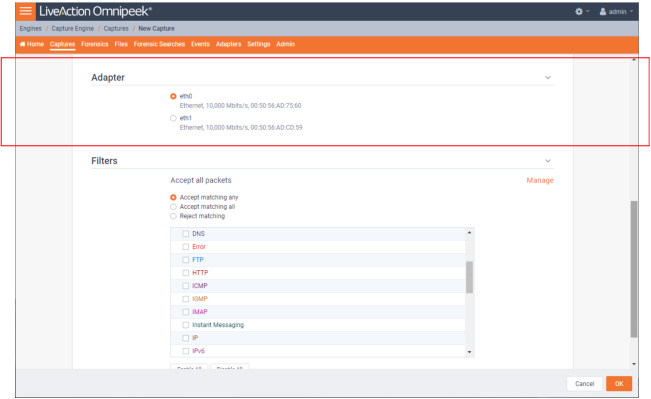
Filters
The Filters settings let you enable or disable filters used when capturing packets or opening packet files. Select the filters you want to enable and then click Accept Matching Any, Accept Matching All, or Reject Matching.
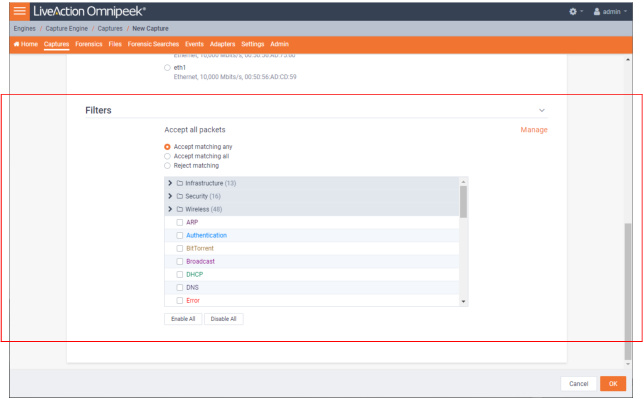
• (Accept all packets): Click to configure filter settings. You can select which filters to enable, and whether or not to accept or reject the packets matching the filters into the buffer.
• Accept Matching Any: When you choose Accept Matching Any, only those packets which match the parameters of at least one of the enabled filters are placed into the capture buffer.
• Accept Matching All: When you choose Accept Matching All, only those packets which match the parameters of all the enabled filters are placed into the capture buffer.
• Reject Matching: When you choose Reject Matching, only those packets which do not match any of the enabled filters are placed into the capture buffer.
• Enable All: Click to enable all filters.
• Disable All: Click to disable all filters.
4. Click .